Solving the Drooping Subaru SVX Visor Problem
Author: LokiDad
Printable Version | Submit FeedbackI am cheap and just hated to spend $110 to $145 for a new sun visor, especially when Subaru's engineering of this part seems to be faulty (as evidenced by the number of problems with this item on SVX's). Buying a new one is like rewarding them for a crappy design.
This "under $2" amount assumes the following available to you in your shop already:
- some "5 minute" epoxy
- flat and Phillips screwdrivers
- a few electrical ties
- a safety razor blade
This repair revolves around the obtaining the following part, which listed for $1.25 at my local hardware store:
#235 Brass Insert manufactured by Hillman

This was the largest brass insert my particular hardware store carried and is used in furniture repair and furniture making. Hillman seems to sell sets of these kinds of parts to hardware stores for re-sale.
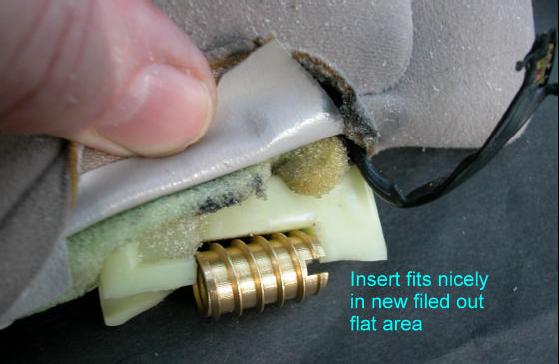
The important thing about this is that it is a DELUXE FIT. The visor shaft that attaches into the roof of your SVX fits so nicely and screws in by itself perfectly – just enough resistance so that the visor works correctly and that it fixes the dreaded droop problem that so many of these visors fail from.
Take a look at the two photos below:


You will find that the Hillman insert fits CUSTOM on the visor shaft: it is tight enough that it almost threads itself, YET it is loose enough that you can adjust it in any position and it will stay put! Perfect for what we need to do, get rid of the dreaded visor DROOP!
Now the next step is to steady your hand, and with a razor, cut right along the seam of your visor, deep enough to open it up so that you can repair the inside. The next two photos will give you an idea of what you have to do next.

You can see what it looks like opened up in the shot below. You won't need to cut any more than a few inches.

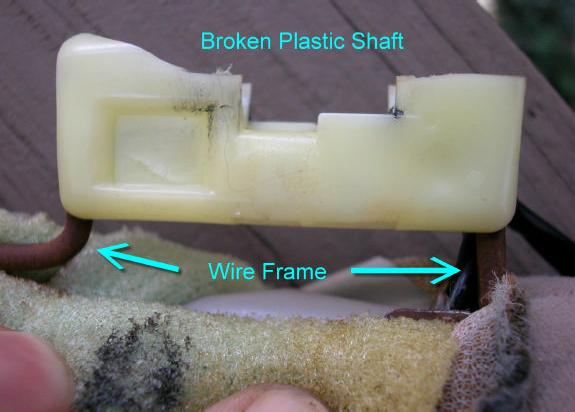
Once you've cut the visor open, you'll find a plastic shaft, that when new, provided just the right resistance for the visor to remain in whatever position you adjusted it to.
Chances are this plastic shaft is what broke or fractured.
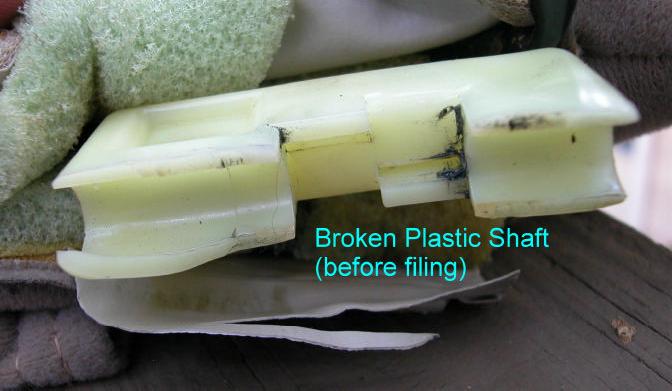
You'll need to see what your particular stress fracture looks like. . . that's what causes the visor to "droop".
Here's what my particular stress fracture looked like:

Yours will be different, but I'll bet it may look much the same. The stress and wear and tear on this part causes the plastic to fail, and therefore the visor droops. That's what has to be repaired!
By now, you can probably see where I'm going with this and the $1.25 insert.
But we have to do a few things first, and to do that, I'll show you a side or profile view of the whole work area and what needs to be done in the next photo.
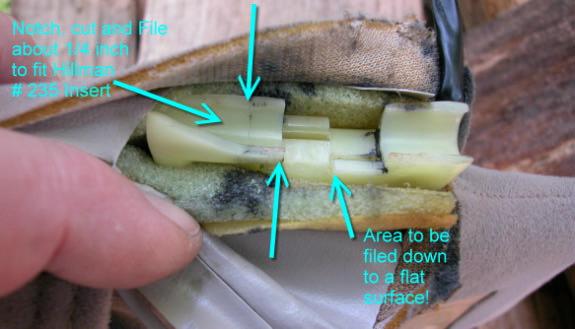
You can see from the shot above that the top of the plastic shaft basically sheared off or broke from age and from being adjusted. The area that we have to work with doesn't fit the insert just yet. There's a little ridge that had some metal clips in it that present a problem, and the overall opening is not long enough for the Hillman #235 brass insert.
Luckily the plastic shaft is held in place by a wire frame (see below) that goes all around the visor. This is what we'll be able to use to our advantage with the electrical ties later.
Here's another view:
You will find that the notch that is already in the plastic does not have a flat bottom, plus the notch isn't long enough for the Hillman #235 brass insert to fit properly. (To see this once again, GO BACK to the photo before the last two and take a good look at it again)
We will have to clip off about a quarter of an inch from the shaft to make the insert fit length-wise, and we have to file it all down FLAT so that the insert rests nicely in place. I used a metal file and it gave me a nice flat surface.
Here's what it looks like when that has been accomplished:

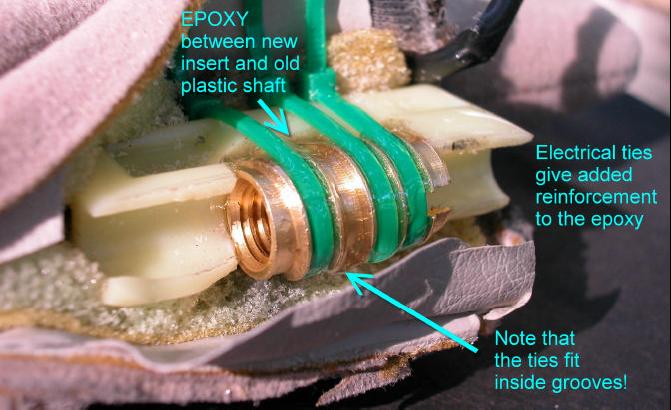
Now we can add the insert, tie it in with electrical ties, and epoxy it in.
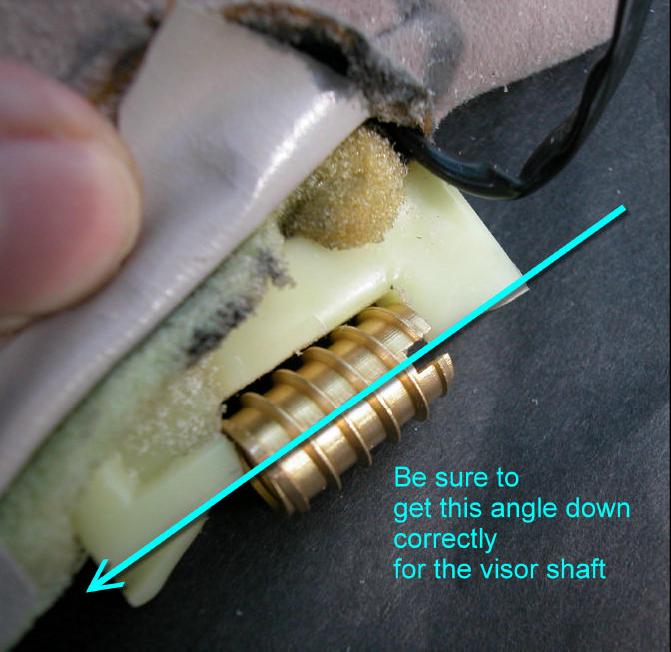
Before you glue everything in, you'll want to make sure that the shaft of the insert has the proper angle to what USED to be there in plastic form before it broke. So be sure to check the angles, and DON'T get any epoxy into the interior of the insert, or you'll wreck the threading area and the fit! Here's a shot of the angle that is critical:
Now that everything fits, we can add the electrical ties, epoxy it all in with the 5 minute epoxy, and then re-stitch or re-glue the visor skin back to the way it was originally.
Here's a shot of the insert glued and tied into place:
And here's another angle of the same thing just for good measure:
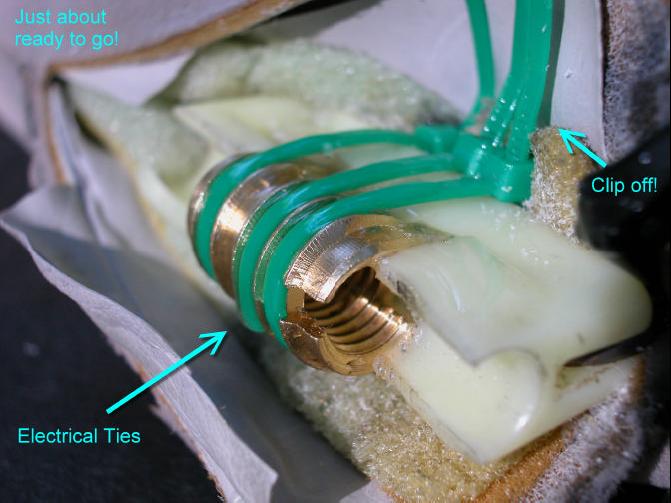
We're just about done.
Now just to stitch it up. But before doing so, you can see I couldn't resist the urge to put in one more black electrical tie just for good measure.

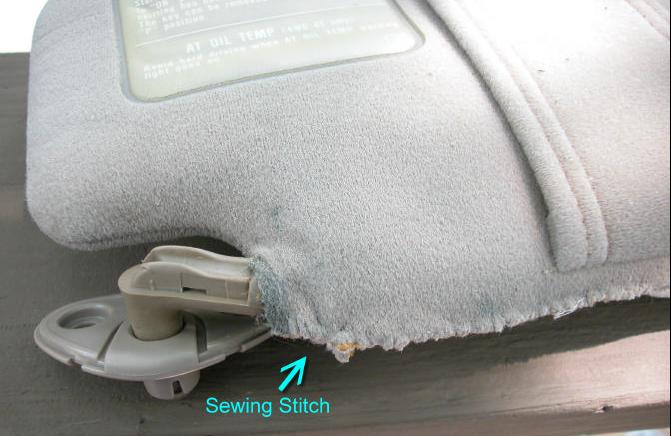
I decided to sew mine shut, even though I'm obviously not the best at sewing. Nonetheless, this seam will go against the outside window and when parked in its normal position, and as my Grandpa used to say, "A man on a slow horse wouldn't see it".
But hot glue will work well too.
Next page is the finished project. No droop for a buck and a quarter! Or at least under five bucks.
Any questions? Contact me on the forum: "LokiDad" and, GOOD LUCK!